In Aadhaar the demographic details are stored in the database in the English language, which is the primary language of Aadhaar. But the same details are also stored in your local language depending upon your region.
In the event of relocating to a different state where the local language differs from that of one’s previous state, individuals have the option to request a change in their demographic details to align with their current local language by opting for Aadhar Card Language Change.
For e.g. If you are living in Karnataka, your local language will automatically detect as Kannada. Now, if you move from Karnataka to Maharashtra and if you want to change your local language to the current state then you will have to follow this procedure to get it changed. Alternatively, if your demographic details are incorrectly spelled in the local language or else if your local language was incorrectly selected then also you can use this method to update your local language.
Table of Contents
Languages Supported
Below are the languages which are supported and which you can update in your Aadhaar.
| English | Assamese (অসমীয়া) |
| Urdu (اردو) | Punjabi (ਪੰਜਾਬੀ) |
| Tamil (தமிழ்) | Telugu (తెలుగు) |
| Hindi (हिंदी) | Bengali (বাংলা) |
| Gujarati (ગુજરાતી) | Oriya (ଓଡିଆ) |
| Kannada (ಕನ್ನಡ) | Malayalam (മലയാളം) |
| Marathi (मराठी) |
Other than these languages, you cannot update your demographic details to any other language in your Aadhaar.
Requirement for Aadhar Card Language Change
| Online Update | Offline Update |
|---|---|
| Registered mobile number mandatory for OTP authentication | Registered mobile number not mandatory |
| Fees to be paid through online Payment Modes such as Debit/ Credit Card or Net Banking mandatory | Payment can be made via Cash |
| No documents needed | No documents needed |
Aadhar Card Language Change Online
To update or change Aadhaar Card language online visit the official UIDAI website https://uidai.gov.in/
Once you visit the Official Website, it will prompt you to select the language in which you want to access the UIDAI website
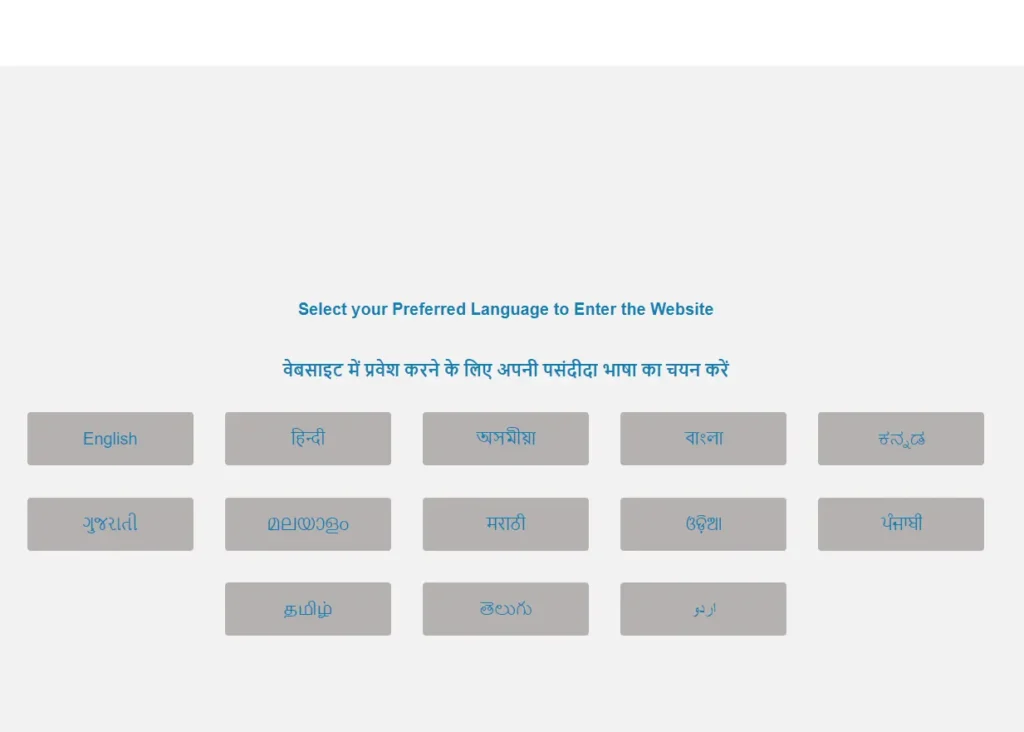
Once making selection of the language, the UIDAI Homepage will open
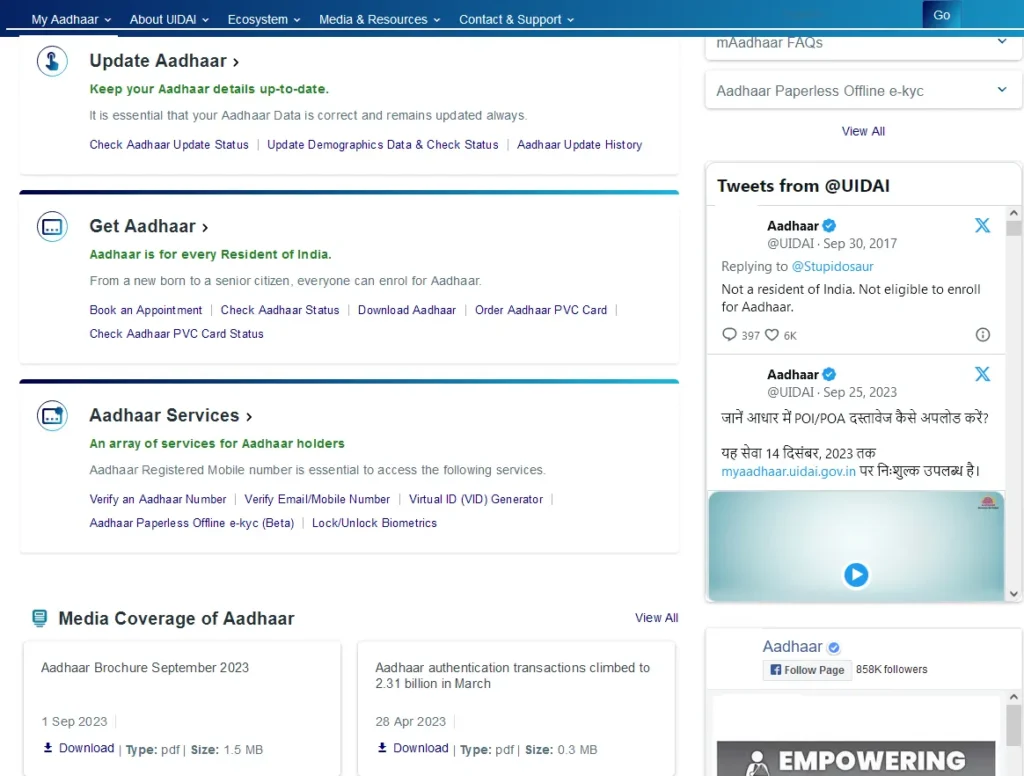
From the homepage, just click on the Update Demographics Data & Check Status under Update Aadhaar section
The page will get redirected to myAadhaar, Click on the Login button
On next screen enter your 12 digits Aadhaar Number, Solve Captcha Security Code and click on the Login with OTP button
A one time password will be sent on your registered mobile number, Enter the received OTP in enter OTP field and click on the Login button
On next page all services will be displayed, from the available services click on Address Update
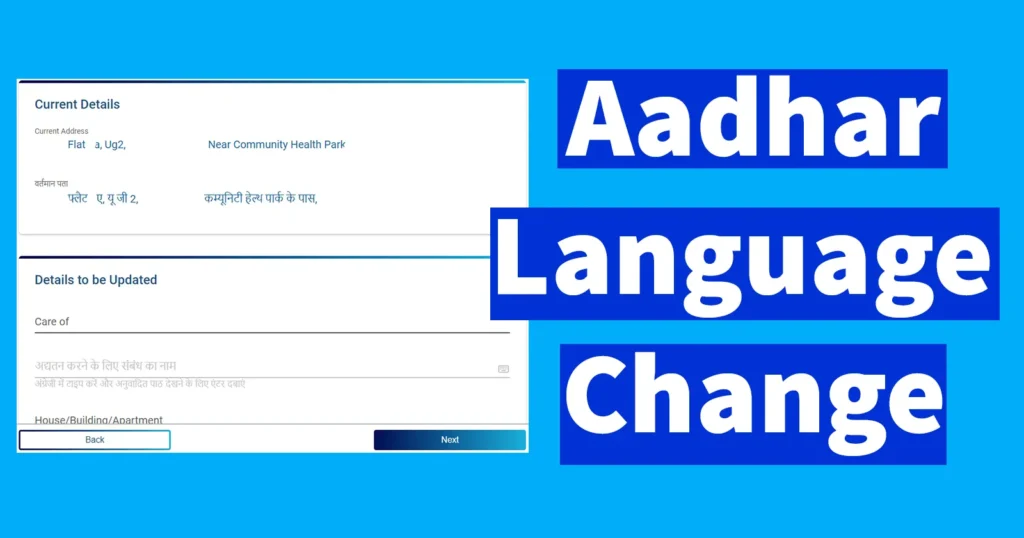
In the current details your current details available in your Aadhaar will be displayed in English language which will be primary language and below same details will be displayed in regional language as per your state local language.
As per your address the secondary language in your Aadhaar Card will get translated. So if you wish to make changes in the language you need to update the Address to the location of which language you wish to set on your Aadhaar as secondary language.
Remember that the Secondary or regional language spellings cannot be edited by yourself as it is translated as per the English language spelling which you enter.
To know the entire process you can follow the Update Address in Aadhaar Online.
Aadhaar Language Change by Aadhaar Seva Kendra
To update or change local language errors in your Aadhaar Card, you can book an appointment online for an update so that you don’t need to wait in the queue.
Visit the Aadhaar Seva Kendra on the appointment day and request for an Aadhaar update application form, mention all your details in the correction form and quote your existing 12 digits Aadhaar Number
Depending on the details which you are updating along with language, you will need to show your documents to the verifier
Once the verifier verifies your documents and form, you will be asked to move to the Aadhaar Operator desk
Your details will be entered into the software and local language will be translated accordingly, you can check if all details are entered correctly
Once done you will be asked to place your finger on the fingerprint scanner device for verification
Once verification is successfully completed your Aadhaar Update Receipt will be printed and handed over to you
You will need to pay the applicable charges at the Kendra for the update done in your Aadhaar
You will need to keep this Aadhaar Update Receipt with you until your request is successfully approved and updated in your Aadhaar
With the URN printed on Aadhaar Update Receipt, you can check the status of your request, however, once your update request gets approved by the UIDAI you will be notified via text message on your phone.
This complete process could take up to 7 day to 3 weeks.
This is a temporary error that you may come across while changing the language in Aadhaar. You may try changing the language after some time or days.
You can update your Aadhaar details in local languages such as Assamese, Bengali, English, Gujarati, Hindi, Kannada, Malayalam, Marathi, Odia, Punjabi, Tamil, Telugu, and Urdu.
My local language is Hindi, but my aadhar status shows local language is english. How can I change it.
My local language is Tamil, but my AADHAR CARD details showing in Kannada how to change the local language Tamil?
Hello Ramki,
The local language in Aadhaar Card changes according to which address you have provided, for e.g. if you have provided Karnataka Address than your Aadhaar Card Local Language Kannada will be displayed and if you have provided Tamil Nadu Address than your Aadhaar Card Local Language Tamil will be displayed.
My card was issued in Mumbai, hence Local Language was originally Marathi; later, I moved to Kolkata.
I followed your instructions exactly, but the Local Language remained Marathi in the confirmation screen, as well as the acknowledgement PDF which I downloaded.
Please find out & post the steps for changing the Local Language.
The original regional language in which the original Aadhar card was generated will not automatically change when you change your address from Karnataka to tamilnadu. I have the experience. I am yet to contact Aadhar centre to get my details changed from Kannada to TAMIL
Changing the address will not change local language on Aadhaar. I was studying in Karnataka when i made my Aadhaar Card. The whole card details is almost covered in Kannada. So far, haven’t found a way to change it to English.